 photo by: Isora Lithgow of Isora Lithgow Creations From as early as I can remember, I have been alongside my grandmother and mother, always the eager helper, ready to absorb all I can learn about food, cooking and preparing meals for a family while living in poverty. And when I say family, I don't mean parents and a kid or kids. For most of my life, family meant extended family all in one apartment. Parents, grandparents, kids, grandkids, cousins, uncles and aunts; the composition of our home was multigenerational and extended beyond immediate family. This was not unusual to me and in fact I often miss it still; feeling the absence of the many elders and peers in the home. Don't get me wrong, it had its many challenges as is common with any group, family especially, that I don't miss! But overall I consider the multigenerational makeup of my homelife growing up as a deep value added to my life.
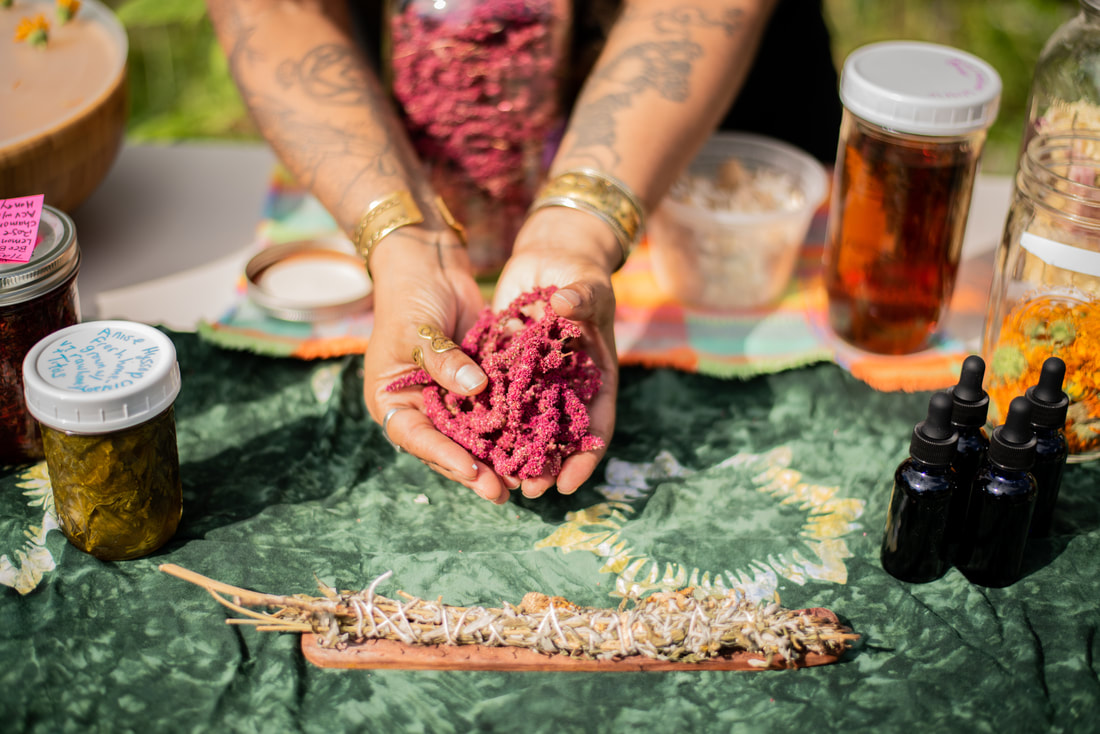
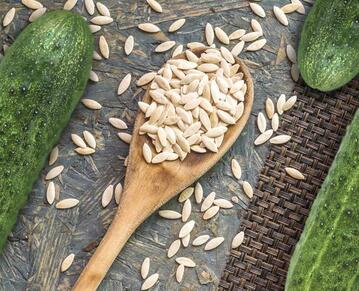
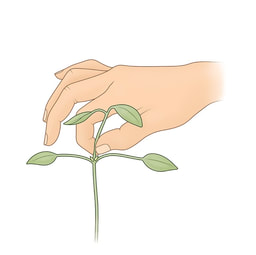
Most of my family immigrated to the United States from an island in the West Indies called Barbados. My mother and father and the generations before them and so on an so forth were homesteaders. They didn't call it that. They called it life. They didn't take a permaculture design certification course or a homesteading workshop. They didn't spend years reading homesteading D.I.Y. books and have online support groups for homesteading. There was no online! They grew their food, fished, raised goats, pigs and chickens, had compostable toilets before they were called compostable toilets and both made and consumed fermented foods regularly without even calling it fermentation. My family came to this country for a "better life". A better life then, like now, is synonymous with what dominance culture defines a better life to be and it was not a simple life connected to the land like they were living. For many black folks who are ancestors of slaves, living a life close to the land became tainted with shame. Why? Because their way of life was co-opted by the colonizer under the framework of slavery for the acquisition of wealth and creation of a dominance culture that still exists to this day. The institution of slavery created a deep schism, fracture, in the bedrock of black lineage and culture. A relationship that once was the foundation of our way of life became something many black folks post slavery want to distance themselves from as it felt too close to the work of slaves forgetting the power this way of life connected us to. So when my family left Barbados in search of a "better life" it meant seeking all the things that would get us on the other side, away from simple living and towards college degrees as many as you can get, a high paying job with a high ranking title and expensive clothes, jewelry, car and possessions. It meant living in a city and "advancing" the way capitalistic dominance culture defines advancing. If that wasn't going to happen for them, my parents and grandparents, the elders in our family, then they would do everything within their power to assure it would happen for us the next generations to come. Here's how dominance culture creeps into us under the guise of something "good" (advancement, success, accomplishments), all the while fragmenting us from our source of true power, sense of self and purpose that reside in the wisdom of these practices that connect us to earth, to our ancestors and to the rhythms of nature. Dominance culture doesn't want us to have access to that wisdom, that power. Dominance culture wants to tap that source dry and keep those cut off from source in a cycle of distractions only meant to keep us fragmented, controlled and oppressed. Instead the time and space these forgotten ancestral practices once took up in our lives have now been replaced with swipes on our screens as we scroll through endless social media apps, the number of unread emails in your inbox and the seemingly never ending to-do lists we all appear to have running in the back of our minds at all times. This is the energy, the pace of dominance culture. Its go-go-go, ungrounded, "can't stop, won't stop", always plugged in, always inundating us with information to zap our energy, fry our energy, split our energy; leaving very little to look at being with food as anything more than a burden. We've forgotten to cook, forgotten what real food is and instead eat "food-like products" and often pride ourselves on that truth seemingly unaware of what we've lost. There's that veil of illusion! This pace is unsustainable and out of balance with nature; resulting in an increased impact on the health and wholeness of not only us humans but all creatures', straining our relationships with each other and our earth. Interrupting the pace of dominance culture isn't something that can be accomplished in a weekend long immersion program, a yoga retreat, a year of travel or finishing a best selling book on the topic. Unlearning the pace and practices of dominance culture requires work. Some good old-fashioned effort. You need to show up and make the choice to actively begin questioning those "beliefs" you think are yours but are in fact seeds of the oppressor and shift your lifestyle practices to seek alignment with nature. This can be explored many ways and begin anytime. What does that pace look like for you? What would have to change for that pace to take hold? What would you have to let go of to enable that pace to become lived? What would you have to make space for so that this pace can take root? This is not about researching what's trendy and then copying it. This is not about putting on a show. This is about your relationship with Earth and you doing your part to slowly shift the currents away from the toxic pace of dominance culture through interrupting its hold on your life. Start somewhere and give yourself time to allow this new practice, and the pace that comes with it, to become habit before integrating another. Like the wisdom that comes from journeying with the Elk; PACE yourself! In this post we will explore an ancestral food practice and sacred food ritual that invites a shift of pace into your life. This practice is one of the responsibilities I was given by my gram when helping her in the kitchen; preparing the grains. It wasn't simply taking a scoop of rice from a bag, popping it into a rice cooker and "setting it and forgetting it". My gram would set me up with this little chair that served as both my little kid chair and the house step ladder. She would bring a large bowl of rice to the sink that had already been soaking in water either overnight or throughout the day. The water was often cloudy and no matter how many times she had told me before she would remind me, through demonstration, how to wash the grain by hand. This process was not quick and involved being repeated over and over and over again; draining the bowl of water in between each washing by mindfully tilting the edge of the bowl into my palm slowly. The palm often transformed into many tools to be used in the preparation of food. There was not a lot of fancy equipment in our kitchen growing up and that was ok because as long as you have a good knife, wooden spoon or stick and your hands you had what you needed to feed your family. So as we stood by the sink massaging the grain, imprinting it with our love and then drained the cloudy water drained through the palm of my hand, the palm would catch any straggler grain from falling into the sink. I can remember really disliking this responsibility, mostly because I found it difficult to do efficiently with little hands serving as sifts for the water to drain while keeping the grain in the bowl. Early on it never worked; I always ended up with grain in the sink! But over time, after many practices with my gram, along with the growing of my hands, increase in my strength and dexterity, I was able to efficiently and effectively drain the water by hand without much, if any, loss of grain into the sink. Yay! My grandmother didnt tell me that this process of soaking and washing repeatedly helped to break down the phytic acids and complex sugars in the grain and cleanse the grain from impurities to make them more digestible for the body. What my grandmother did tell me is that this is the way to prepare rice. Period. We didn't need the colonizers love of using science to validate the ancestral wisdom we already knew. She and I both knew why we prepared the grains this way. That knowing came from what our bodies told us about the food and what our ancestors living and breathing through us shared with our hearts as we prepared food. That knowing came from within us not from an external "credentialed" scientific source that bestowed knowledge upon us. This internal knowing was and still is connection to our real power. As we got older and lived in this country longer and began eating more of the American diet, the instruction remained the same, but the explanation began to shift to this practice being the old way to prepare rice. She could feel, as could I, these practices slipping away in the pursuit of the illusion of "a better life". I've said it before and will say it again and again and again; food is much more than what we chew, swallow, digest and excrete. Food is a portal to one's wholeness, healing, lineage, wisdom and transformation. Food is love and we are an embodiment of divine love that is fueled, nourished, supported and guided by the magic that resides in real food prepared using the old ways. Journey with your food; recognize its life, prana, chi, ashe, energy. Whether it be plant or animal based all real food connects us to its life. That life is take into us to sustain our life. This is the full circle and what it means to be in rhtymn with, not over, nature. A N C E S T R A L * P R E P A R A T I O N * O F * G R A I N S Ingredients: - Grains (e.g. cornmeal, polenta, rice, quinoa etc. - Water (to first soak grain overnight and wash by hand repeatedly until the water runs clear - Kombu or Splash of starter from ferments Step One: Soak grains overnight or first thing in the morning until dinner. Add a splash of ferment juice or kombu. This breaks down the hard to digest parts into easier to digest parts. Step Two: After soaking wash the grains, draining in between washes until the water runs clear. Step Three: Prepare grains as usual. That's it in a nutshell. S A C R E D * F O O D * R I T U A L Before preparing the meal begin by grounding the body bringing your awareness to the place where your body meets the earth. Take a few breathes into the earth and when ready begin getting organized to prepare your meal. Feel free to be barefoot, play music, light incense, whatever invites not only grounding but joy. Let your space where food is prepared be a joyful one; even if that joy is not externally expressed but held within. From the moment your body makes contact with the food you are preparing consider the life-force energy that resides in all real food AND within you! Feel that connection feed each other through every touch of your hands to the grains. As you massage the grain, gently, and wash it until the water runs clear envision those who will be partaking in this meal and ask that this meal nourish them. Let the messages of love and gratitude be spoken within the mind and heart and out of the mouth if so inspired. I, like my grandma, often "speak to myself" when its really us speaking to our ancestors while preparing food. When the water runs clear and its time to cook the grain as usual continue to practice with every addition of seasoning or legumes to the grain and every stir of the spoon. When the grain is prepared and ready to serve do the same thing as you eat. With every bit savor, journey with, listen to... with every bite be grateful and embody gratitude. Knowing that each blessing energetically imprinted into your food which then became apart of your body. Nothing lost. Apart of. Whole and healing through the lens of food. You have this one life; don't rush through it, midwife it. The word midwife simply translates to mean "be with". Its one of my favorite words. Be with your life by inviting these practices into your life that make it so much more delicious. Thank you for listening/reading and let me know what your experience with this practice is like, I would love to hear from you!
0 Comments
Embodied Altars: Portals of Ancestral Reverence is from Candace's Braided Seeds ZINE Note: There are many ways, across many lineages, to practice ancestor reverence. I have not been blessed to find a living teacher to guide me in such practices but I have found my own path and philosophy that is ever evolving. In this piece, I share some of my journey with you in hopes that it supports you in connecting to your lineage. You are an embodiment of your ancestral lineage(s) and as such you are the primary altar upon which you tend to your relationship with your ancestors. Pausing to acknowledge this powerful truth is where the practice of ancestor reverence begins. What is ancestor reverence? It's the many ways one can connect and center one’s ancestors, roots and lineage in one’s daily life. For many, this practice is centralized around an externally curated altar. While I do have an ancestral altar and encourage folks to explore this practice if one hasn’t already, I am most interested the embodied ancestor altar that is y o u. How do you tend to y o u r s e l f as a living, breathing embodiment of your ancestors? Instead of, or in addition to, a table covered in white cloth and carefully curated with representational pieces that connect and ground you in your ancestral connections, imagine that this practice centered y o u as the intentionally curated altar. Y o u are the primary p o r t a l of connection to those that came before you. The science of epigenetics affirms that sacred truth that you and I hold the stories of our ancestors within our bodies. It is my belief that the deeper we each connect to our own self the deeper we connect to our inherited ancestral wisdom. Why practice ancestor reverence? To know oneself more fully; self awareness. To live more mindfully. To do one’s part in this life to heal generational trauma and co-create a new narrative for oneself and future generations. This is the alchemy of ancestral work. Opening oneself to remember the truth of one’s ancestry; the trauma and harm caused by and/or inflicted on, as well as, the resilience, brilliance and love of one’s ancestors is our responsibility to understand within. Some questions for reflection when working with ancestors:
How do I connect to my ancestors? First and foremost, I feel compelled to briefly acknowledge that as a child of colonization, I am the descendant of both displaced peoples of Africa that were enslaved and European colonizers who committed significant atrocities. As a result of the violence of colonization, I don’t have easy access to my ancestral traditions in ways I would like. When I think about that it triggers a range of feelings; anger, frustration, grief, sadness, jealousy of those who have immediate access to their ancestral traditions etc. I meet those feelings with compassion and love, giving myself plenty of space to feel my feelings while carving out my own way of being in sacred relationship with my ancestors. So with this understanding, I began my practice by asking... who are my ancestors and where do my ancestors dwell? Who are my ancestors? My ancestors are the deceased human beings that I am the descendant of but I want to expand the answer to this question to acknowledge that we are also apart of the land and cosmos. Remembering this often forgotten truth opens me up to the powerful kinship we are each born to inherit and nurture with our plantcestors and other landcestors; for example, our birds, trees, rivers, mountains, bees etc are our kin as well. Remembering that we are on planet Earth floating in the cosmos. We are deeply entangled in a celestial dance with our planetary relatives and cosmic ancestors that influence many things like our tides, moods, seasons and cycles of life and death. It's in these spaces that my ancestors dwell; each its own portal to deepening my personal connection with them and ultimately coming into a fuller knowing of myself. 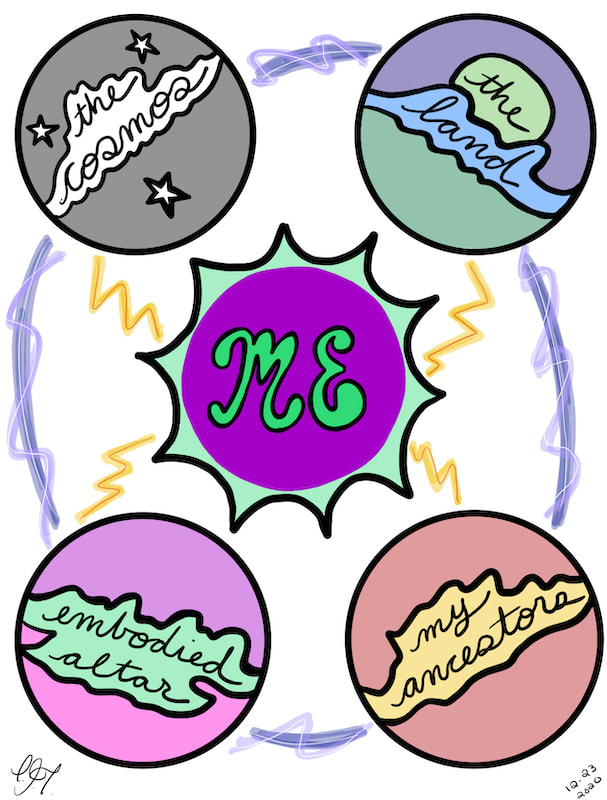 Here is a glance at some of the ways I personally practice ancestral reverence within the portals/ gateways of my ancestors, my embodied altar, the Land and the Cosmos.
The Cosmic Portal: Lunar rituals on the new moon, full moon, super moons, eclipses or celestial events like the Solstice and Equinoxes. Daily practices that center the planetary energies and relationships to specific days; for example, Mondays are Moon Day and a great day to do shadow work, Thursdays are Jupiter Day and a great day to do wealth and abundance cultivation work, Fridays are Venus Day and a great day to center love and beauty, Saturdays are Saturn Day and a great day to do protection work. I like to integrate practices like divination with tarot, meditation/prayer, vision boarding, journaling, intuitive movement and nature walks. I also like planting seeds, harvesting and working in my garden in conjunction with what’s occurring in the cosmos. The Land Portal: Land stewardship is a central part of how I live my life and in as such I accept the inherent responsibility to tend to the land as an extension of my whole self. This looks many ways; living at a slower pace and in alignment with the rhythms of nature. This pace gifts me the spaciousness needed to receive the medicine, guidance and stories of my ancestors through the plants, trees, birds, rains and more. There are many ways the land speaks to us if we are open to witnessing. I work with animal oracle cards, look up the sacred meanings of the landcestors that present themselves to me, I meditate with plants and animal guides, journal, dance, drum, dream and take notice of any resounding themes. I get my hands in the earth and listen; honoring the generations of stories held in the soil alone. All of these practices deeply cultivates my intuition and enables me to more quickly discern the communications I receive from the Land. Ancestor Portal/Altar: I curate an altar table or piece of art that grounds me and serves as a physical totem or touchstone for connecting to my ancestors. It is important for me to be clear that I do not only work with the ancestors I knew and had a relationship with. I don’t only work with my benevolent ancestors. I choose to work with all my ancestors; those who were colonizers and oppressors, those who were healers and liberators, those who were enslaved, those who are not here for me and those who are here for me, those whose names and faces I know and those whose names and faces are unknown to me. I choose to connect with all of my ancestors because I am personally committed to doing my part in this life to heal the wounds and woundings of those who came before me. This requires a personal commitment to go deep within and welcome the discomfort as well and the ease that comes with daring to be whole and free with my story. Some things the physical altar or artwork can contain are:
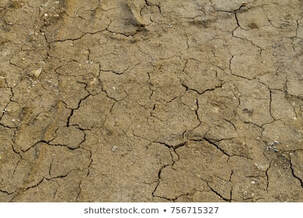
Embodied Portal/Altar: I center tending to myself on all the layers; physically, mentally, emotionally, energetically and spiritually. Sleep. Nourishment. Water. Adornment that connects me to the land, my ancestors and my heritage(s). Self study/inquiry/examining my patterns of behaviors and thought via practices like yoga asana, meditation, pranayama, journaling, talk and somatic therapy. Shifting toxic patterns of self talk and lifestyle to new patterns of self love, gentle pace, boundaries, learners mind, wholeness and living with not over the land and its rhythms, stages, phases and cycles. I come to my ancestors in each of these portals with deep humility, a desire to learn, a full awareness of both my power and my limitations, and a commitment to do my part for my personal and ancestral healing and wholeness. Im still discovering my own way of being in relationship with my ancestors. This practice has gifted me with a well of wisdom to draw from for guidance and support, an expanded perspective on life, inner clarity and discernment that promotes a sustainable state of embodied grounded-ness and compassion even during tumultuous times. Feel free to integrate what resonates in this piece and discard what doesn’t resonate. Until I am the ancestor myself, I want to name how profoundly grateful I am for the plethora of ways ancestral reverence as a lived practice has expanded my way of being present and participatory in this cherished life. 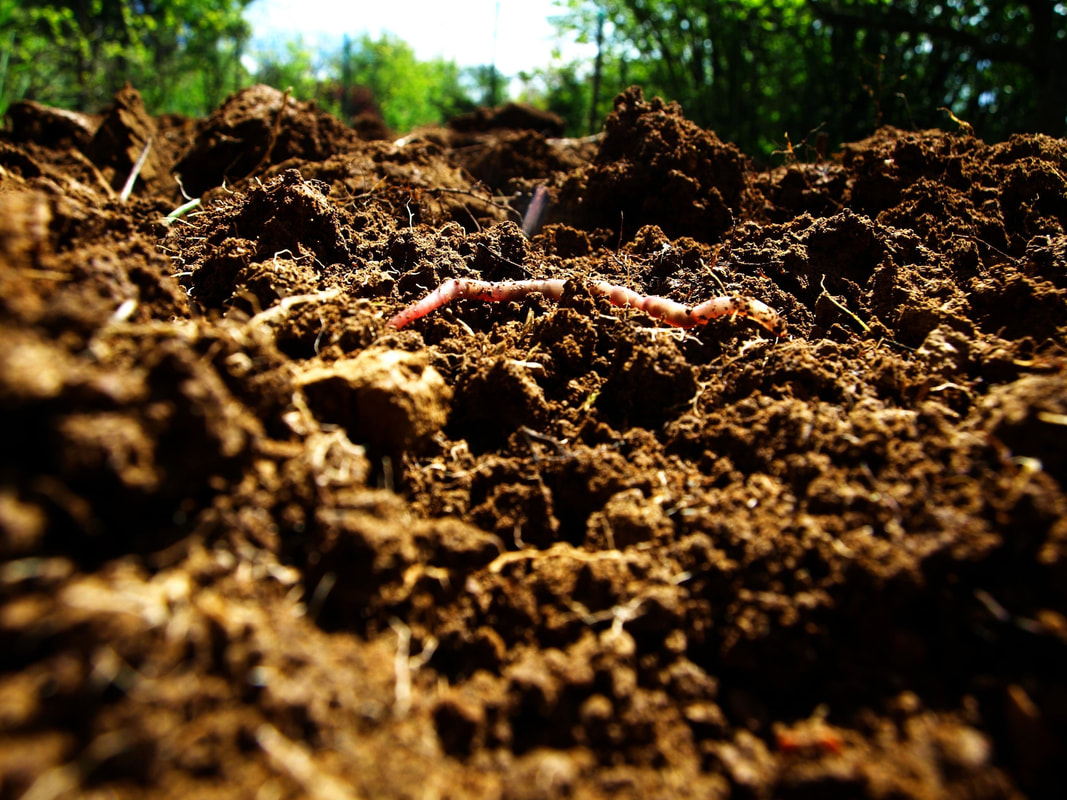 S O I L Soil is a powerful resource; it's the home, the temple, of all you grow. Having a fundamental understanding about soil, what makes its healthy and how to care for it directly impacts the soils ability to grow foods and herbs as well as protect the environments natural resources. Here's a general overview of healthy soil outlined below. Soil Organic Matter (SOM) - SOM is made up of living organisms both fresh (no more than 3 years; still provides food for soil organisms) and decomposed (between 5-1000 years old; mainly carbon and no longer food for soil organisms).
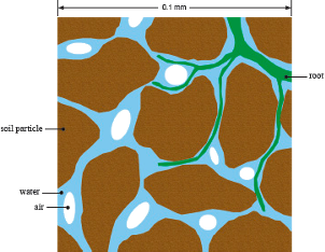 Soil Tilth: tilth is referring to the physical condition of the soil; preferably porous, breathable, penetrable by root systems and easily able to receive water.
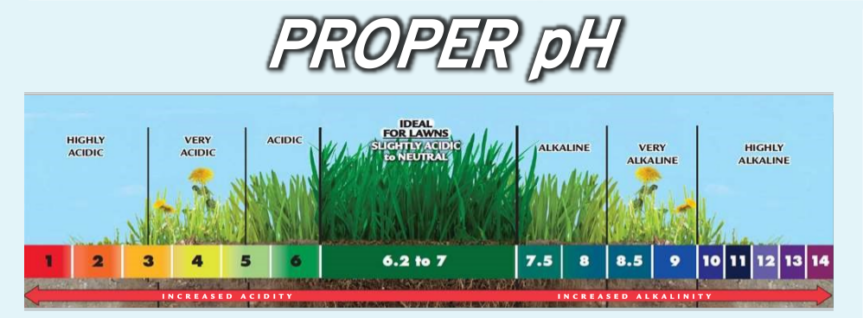 Soil pH - a neutral soil pH is 7. Acidic soils are below pH7 and alkaline soils are above pH 7. pH impacts the availability of nutrients in the soil. Most crops prefer a pH of 6-6.8 When doing research on plant pH it is commonly centered around the need to maintain and monitor the soil's N (nitrogen), P (phosphorus) and K (potassium) levels so let's begin there. 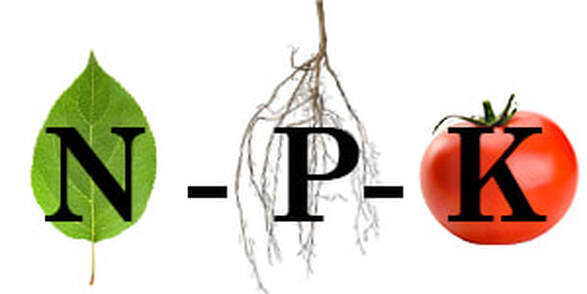 Nitrogen promotes healthy foliage (too much can result is rapid growth but poor flowering, too little stunts the growth) Signs: short plants, small leaves and yellowing Phosphorus promotes strong roots, flowering and larger seeds (excess leads to poor growth and bleaching because it impacts symbiotic bacteria and fungus that aid root systems in taking in water and nutrients / too little causes leaf death) Signs: excess weed growth, stunted plant growth and bleaching leaves, older leaves turning “fall” colors early and falling off. Potassium supports overall plant health (excess can block Nitrogen and Phosphorus uptake / too little can lead to disease and poor health) Signs: brown scorching and curling of leaf tips, yellowing between leaf veins, stunted growth and purple spots on the bottom of leaves When you procure fertilizers there are always 3 numbers on the product. Those 3 numbers correspond to the products levels of N (nitrogen), P (phosphorus) and K (potassium). For example a fertilizer with a 10-10-10 is equal percentage (10% to be exact) of N P K. How do you determine the correct fertilizer? You can learn the fertilizer needs of individual plants as well as test the soil to determine its pH and what it will need to return to homeostasis. You can procure a testing kit online or at most gardening stores. For folks that are local to me in VT I also recommend sending a sample of your soil off to the University of Vermont (UVM) for testing at the beginning and end of each grow season. https://pss.uvm.edu/ag_testing/?Page=soils.html Maintaining soil N P K can be challenging and requires frequent soil testing (monthly and at the different stages of plant growth), observation of the behavior and physical attributes of the plants and soil and using that information to continue to feed the plant(s) throughout the grow season. 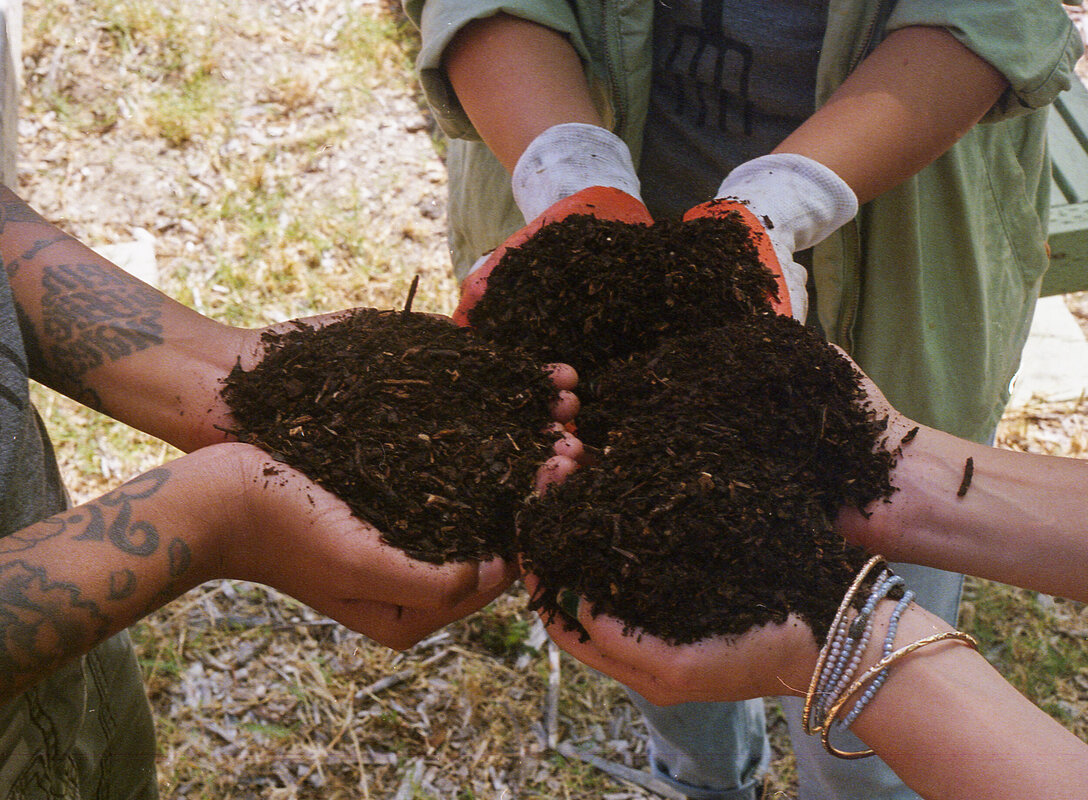 Soil fertility is the ability of soil to provide a holistic environment for growing healthy plants. To do this is needs a balance of nutrients. It's important to note that soil fertility extends beyond understanding soil pH and monitering N P K alone. Biodiversity both above and below the soil is important to soil health, fertility and mitigating plant disease and minimizes pest infestation. So as much as you tend to the health of the soil directly it’s equally important to tend to the soil indirectly by planting a variety of plants (heirloom, organic), feeding the wild birds, growing a pollinator garden and allowing the growth of wild plants that serve as both habitat and food for beneficial organisms.  This blog post continues where How We Plan Our Homestead Gardens ends; digging deeper into some of the topics highlighted in that article and sharing some new information as well as helpful resources. Let's dig in and begin! Filling your Garden Beds: As I shared in How We Plan Our Homestead Gardens, on our homestead we practice a methodology called square foot gardening. This methodology uses containers and therefore requires one to figure how to best fill those containers before planting seeds or seedlings. This can feel intimidating sometimes depending on how you feel about math. Regardless of the size and depth of your garden beds these resources should be helpful in ascertaining the correct amount of container soil to add.
Gardening Tools: Along the journey of gardening one can definitely accumulate some tools over time. Whether you are obtaining gardening tools new, using ones you already own and/or borrowing them from someone else please take some time to clean each tool thoroughly. It's important to get into the habit of cleaning tools before and after using them in the garden; especially if they have been handling diseased plants. Make sure to carefully inspect your tools as well, to notice any need for repair or maintenance, especially if there is rust.
Zones: As I wrote about in How We Plan Our Homestead Gardens it's important to establish a planting timeline whether you are planting from seed or obtaining seedlings. Part of that process involves establishing what geographical grow zone you are in; this is typically based on your regional climate. Below I have linked a website where you can enter your zip code and find out your grow zone.
 Seeds: Depending on what route(s) you are exploring you may be growing your gardens from store-bought seedlings and/or from your own homegrown seedlings that you start from seed. Now that your garden beds are full, fed and you know what grow zone you live in, you can begin to make both a list, and timeline, of what you want to grow. I highly recommend using seeds that are from local distributors; organic, heirloom and native varieties when possible. You can also find local seed exchanges/shares. Over the years, I have grown my own selection of home cultivated seeds from both cultivated and wild plants on our homestead. The times we do buy seeds I procure them from these two sources mainly:
Feel free to share additional seed companies to check out in comments below!  If you are planting from seed some basic supplies you may need specifically for growing your seedlings are:
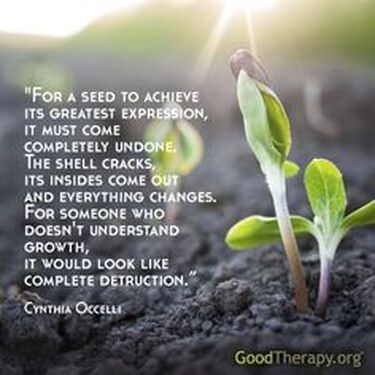
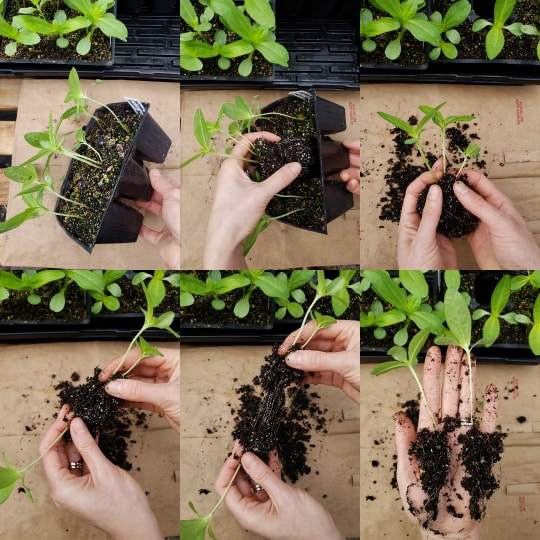
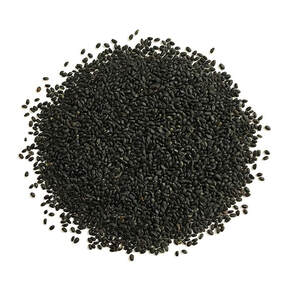
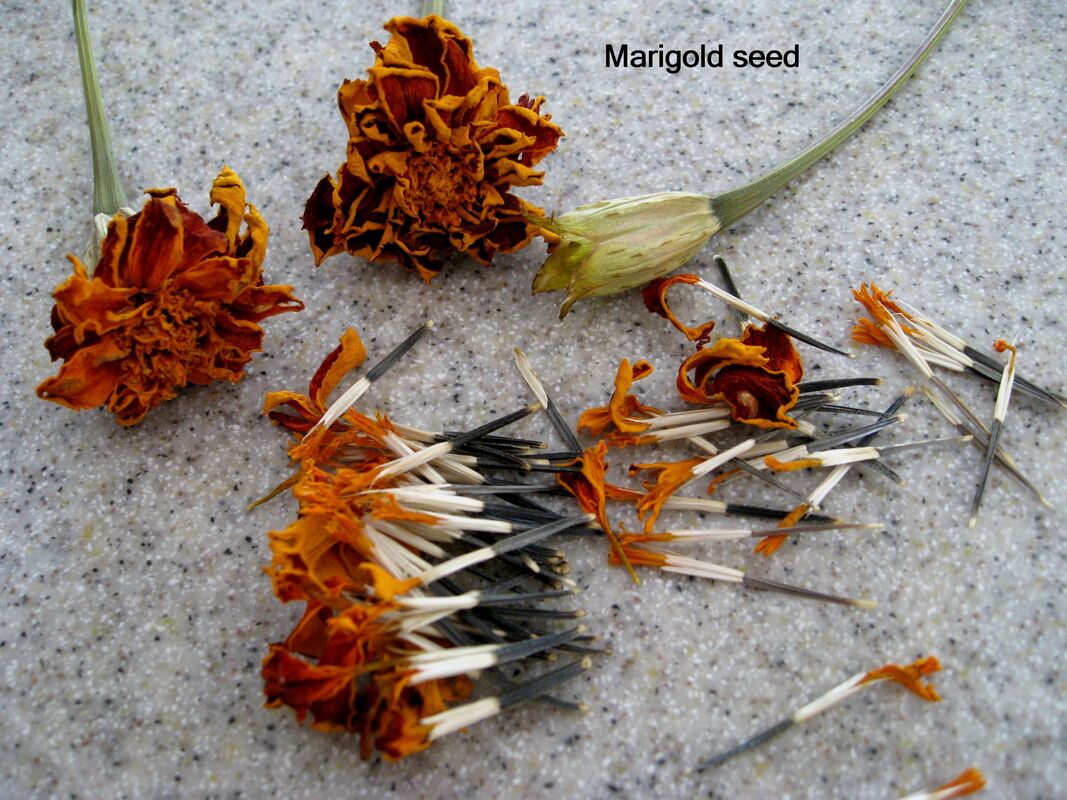
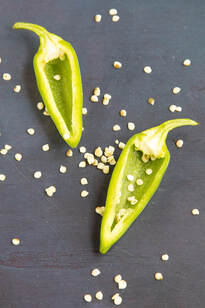
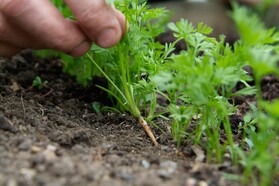
Some seeds can be directly sowed into your garden bed and some are best started as seedlings in an indoor grow space before transplanting into the garden bed. You can go all-out and obtain indoor grow tents, shelving systems, lights, fans, warming mats etc. And you can keep it simple and affordable and set up a table or two in a windowsill or well-lit space to grow seedlings. When you are planting from seed it's important to read the seed packets completely and do some research on the specific species of plant you are growing to learn the best way to germinate that seed(s). Again, some seeds are best grown by directly sowing them into the garden bed (ie. cucumbers, legumes, watermelon, radishes, leafy greens etc.). Some seeds need to be soaked and/or scarified to germinate/sprout before planting (ie. passionflower/Maypop, okra etc.). After all seeds have been planted its important to know that you can save the remaining seeds in storage until the next grow cycle, which, depending on the plant, can be within the same grow season or in the next year. Some examples of places you can store seeds are: in the seed packets themselves, in glass baby food jars or mini ziplock bags. Make sure the bags/jars holding your seeds are sealed properly and stored in a cool, dark place. The germination timeframe varies from plant to plant; some can take as little as a week or two before peaking above the soil and some can take longer. Be patient and remember that one of the biggest gifts growing food offers us is practice in being present, moving slowly and honoring the ebbs and flows, the rhythms of nature. This is a deeply valuable practice and is essential to decolonizing our relationship to the land and to life itself. So instead of trying to rush the process and make the experience of growing food fit into your expectations or into the capitalistic pace of our culture, let the experience of growing food change you, teach you, transform you and encourage you to question and redefine the pace at which you move through life. Every seed equals one plant, so essentially one seed is needed to grow one plant. Using a finger or tool specifically for sowing seeds, make a hole about an inch deep into the soil. Place the seed into that hole the gently cover the seed with the soil. If you are planting a seedling the hole made into the soil would likely be scooped/dug with the palm or a small shovel. The seedling and its soil would be removed from the seedling tray and gently placed into the hole then covered gently with the soil. Taking the hands and tenderly yet firmly pressing the soil around the base of the seedling stem to ground it into the garden bed. It's a good practice to plant a few seeds, typically 3-4 per hole, to ensure there is more potential for the seed to make its way to a mature plant. Seeds and seedlings are particularly vulnerable because they are small, their roots are still growing and not fully established meaning they are more easily uprooted or disturbed. Additionally, in their young stages they are more delicate as well. Below, this sacred seed prayer beautifully articulates why planting a few seeds is a good practice. "Plant four seeds One for the worm One for the crow One to rot and One to grow" There are many things that can happen to a seed along its path to maturity. A seed may not germinate, a seedling may not be able to withstand disease, wild animals and bugs nibbling on them, the weather patterns or watering cycle can sometimes be too harsh on a seed. "For a seed to achieve its greatest expression, it must come completely undone, the shell cracks, its insides come out, and everything changes. For someone who doesn't understand growth it can look like destruction." Some seeds are best grown by sowing them into small seedling containers and then easing them into the garden via a process call hardening. Hardening is essentially weaning an indoor seedling by slowly exposing the seedling to the outdoors for a few hours a day over the course of 3-5-7 days. This practice gets the seedling accustomed to being exposed to the living outdoors in the sun, rain, breeze and amongst wild life. Once that period of time has passed the seedlings are more prepared to withstand the transplant and transition from growing indoors to outdoors. Below are some examples of varying sizes of seed: 1) Basil Seeds (top left) 2) Cucumber Seeds (top right) 3) Marigold Seeds (middle left) 4) Nasturtium Seeds (middle right) 5) Pepper Seeds (bottom left) 6) Legumes Seeds (bottom right)
Seedlings: Magically, the seeds have emerged from the earth to reveal themselves as seedlings; symbols of new life, life and hope. Outlined below are some ways to tend to seedlings/starts as they are continuing to grow into mature plants.
I hope this blog post is supportive along your growing journey! Blessings, Candace Glossary:
What is peat moss? Peat moss is a dead fibrous material that forms from mosses and other living materials decomposing in peat bogs. It’s used mainly as a soil amendment and has an acidic pH. It doesnt contain harmful microorganisms or weed seeds. What is vermiculite? Vermiculite is a mineral that is used in gardening to aerate the soil and increases water and nutrient retention. It wont deteriorate, rot, mold, its sterile and non-toxic. What is compost? Nutrient rich organic matter that evolves from waste. What is lime? Ground limestone rock that alkalizes the soil. What is sea kelp meal? Helps the support soil structure, maintain moisture and its natural minerals and amino acids are like a super food for microorganisms in the soil. What is fertilizer? Nutrients essential to plant growth. (eg. chicken poop) What is azomite? Natural mineral that serves as a fertilizer, a soil amendment and can also help fight off pests.  My partner Tony is a person of many talents; one being an amazing mixologist. This is a little recipe he concocted the other day that I had to share! We came up with two names for this drink and couldn't decide on which one to officially call it:
Tony and I currently live in Vermont and have for 13 years now. My family is from Barbados and Bajans affectionately call our home island BIM. One of my favorite drinks is an Old Fashioned. So Tony made this variation of an old fashioned with an exquisite rum made in Barbados at a distillery we had a chance to visit called St. Nicholas Abbey, local Vermont maple syrup and my very own Whole Heart CBD Rose Bitters. {Fun fact: Did you know that Barbados invented rum?} I N G R E D I E N T S 2.5 ounces of St. Nicholas Abbey Rum Dash of CBD Bitters Splash of Club Soda Squeeze of Fresh Lemon Splash of VT Maple Syrup Pinch of Raw Sugar Ice Optional Orange Rind and/or Maraschino Cherry In your mixing container add your raw sugar, maple and squeeze of lemon juice to the bottom and quickly mix by mashing with a pestle. Add the St. Nicholas Abbey Rum, splash of club soda, dash of CBD bitters and ice; then cover and shake until well blended. Pour into a glass with ice and feel free to garnish with an orange rind or maraschino cherry. Enjoy! 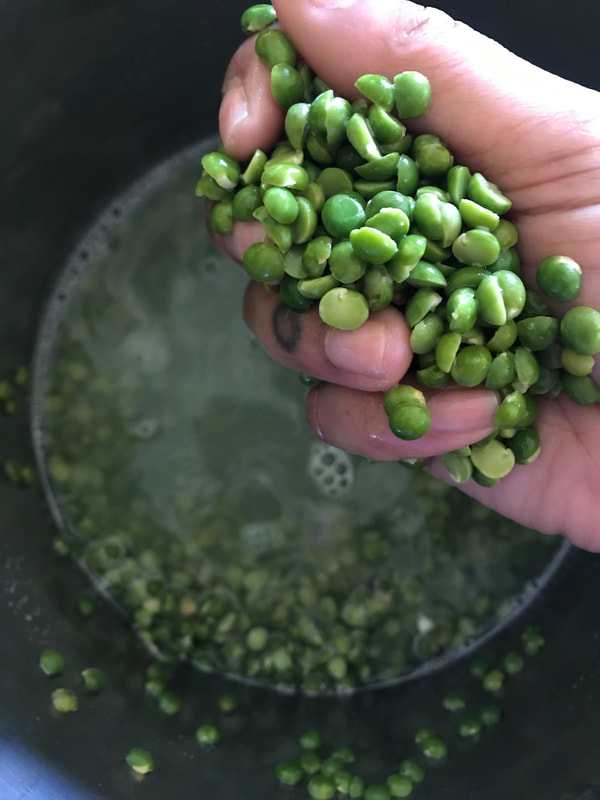 Split Pea Soup Ingredients:
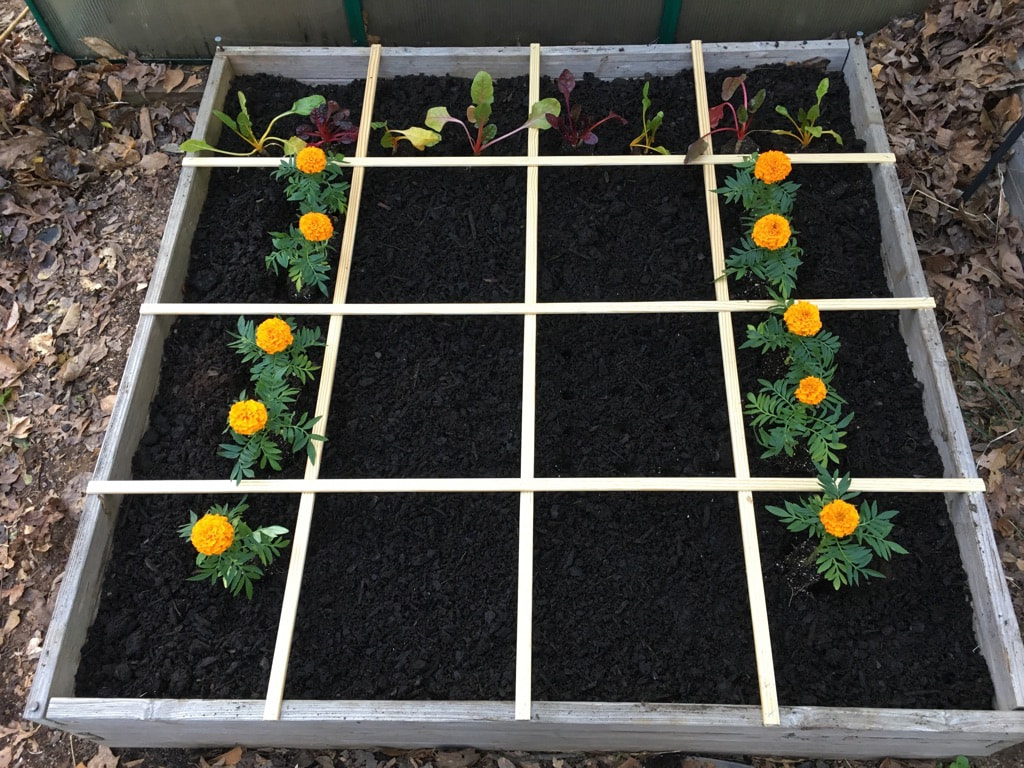
5-6 cups of water for both soaking 5-6 cups of water or broth for cooking 2.5 cups split peas (green or yellow) 1 ham bone 2 large onions (chopped) 1 tsp salt 1/2 tsp of dried hot pepper or peppa' sauce or a fresh small pepper 1 cup of fresh or canned pumpkin, carrots or sweet potatoes 2 tsp of thyme black pepper to taste fresh parsley Split Pea Soup Directions: When working with whole legumes its important to practice two simple ancestral techniques: 1) Wash split peas - Place split peas in a bowl and cover with water. Gently massage the peas with your hands and infuse them with your gratitude and loving intentions. The water may cloud up with dirt from the peas. Strain the peas and repeat this process until the water runs clear during massage. Once this is completed you will prepare the split peas for soaking. 2) Soak split peas - once the split peas are cleaned place them in a bowl with 5-6 cups of water overnight (optional add a piece of kombu to the water of soaked peas). When the split peas are done with soaking, strain them and place them in a pot with the onions, water/broth, ham bone, hot pepper, thyme, salt and black pepper. Bring it to a boil, lower to medium heat and let it cook for about 30 minutes. Then add the pumpkin/carrots/sweet potatoes and let it cook for another 15 mins; your soup will begin to thicken with the addition of these root vegetables. If you're adding dumplings (recipe below) to your soup gently drop the dough into the soup by the teaspoonful. They take about 10 minutes to cook through and plump up. Stew/Soup Dumplings Ingredients: 1.5 cups of flour or (1 cup of flour and 1/2 cup cornmeal) 1/2 tsp salt 1/2 cup water or milk 2 tblsp sugar 1.5 tsp butter or ghee 1 tsp baking powder 2 tsp curry powder pinch of nutmeg Dumpling Directions: Mix the dried ingredients into a bowl. Cut in your butter or ghee and blend with fingers or fork. Make a little well in the middle and add your water or milk into the well. Slowly fold in the flour with your hands or a spatula until you have a dough. Set aside until ready to cook in your soup/stew; typically add to soup at the end of the cook. At that time, gently drop the dough into the soup by the teaspoonful and cook until they plump up, about 10 minutes. Enjoy! 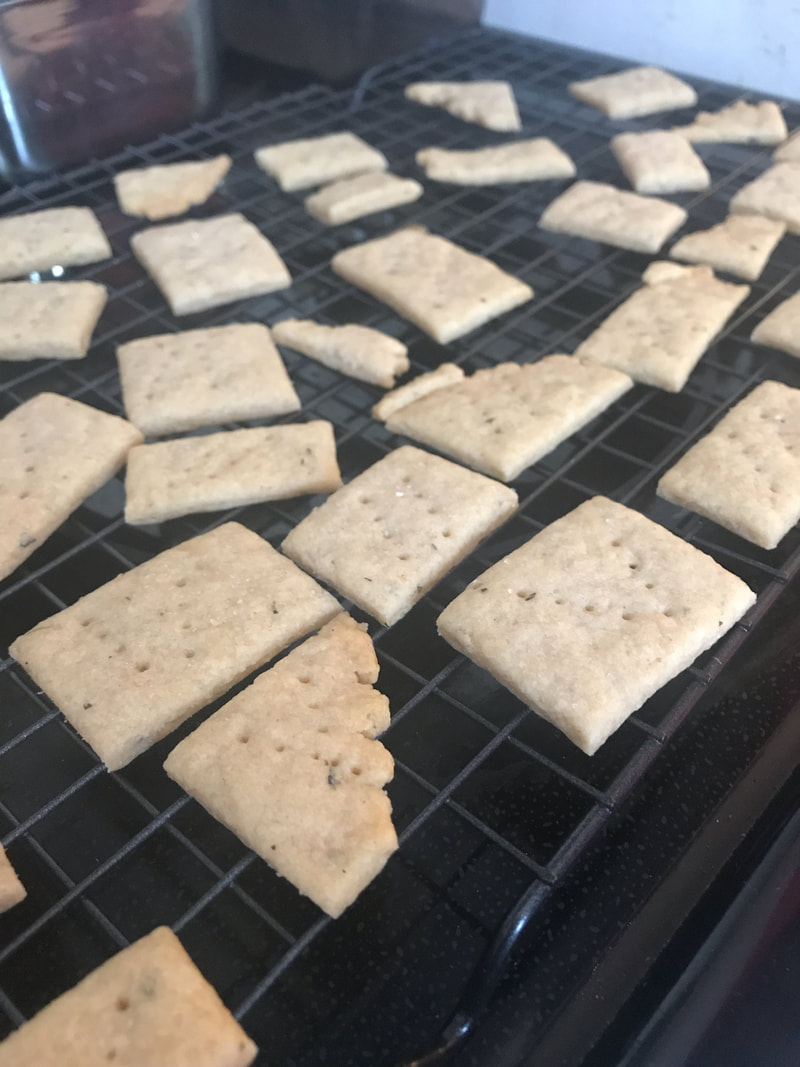 Primary Ingredients: 1 cup sourdough starter 1 cup flour 1/2 tsp salt 4 tablespoons of fat (for example - butter, leaf lard, coconut oil, ghee etc.) 2 tablespoons of dried or fresh herbs/spices (for example - rosemary, thyme, umeboshi, dill, chipotle etc.) Additional Ingredients: oil (for brushing the top of the crackers before baking) salt (for sprinkling on top)  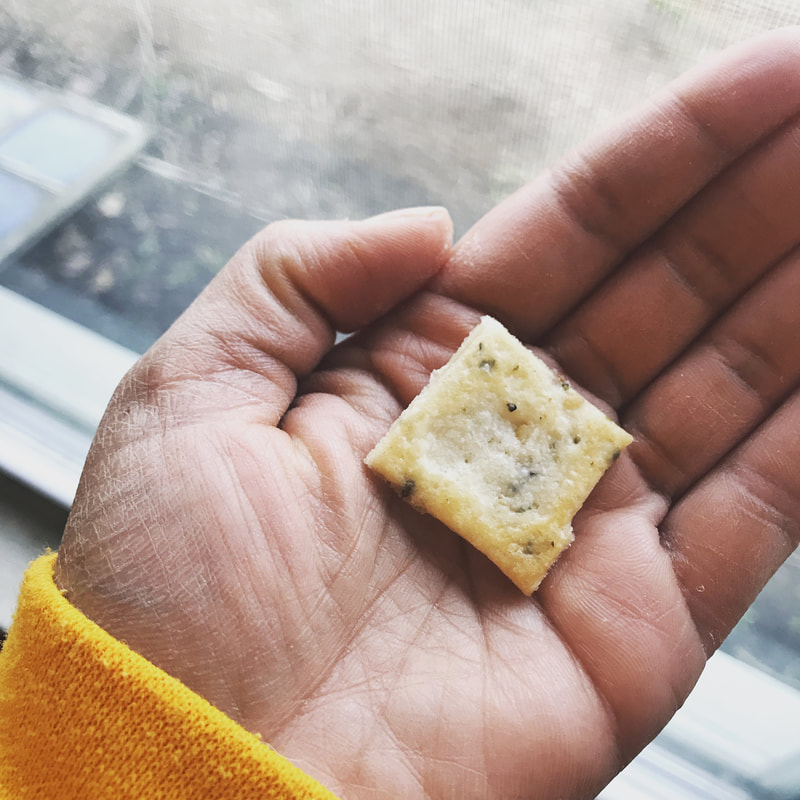  Each year we wait for it; the arrival of our favorite local organic seed catalogue. Its usually deep into Winter when it arrives but it serves as a reminder that Spring will soon return. As an urban homesteader this means that although its a Winter wonderland outside, its time to start remembering the sun-kissed Earth blooming and buzzing with life; its time to begin planning next year’s gardens. So with that intention in mind we write to share the way we plan our urban homestead garden. Our Gardens At our urban homestead we have a few different gardens. A shade garden at the front of our home filled with hosta from Tony’s childhood home as well as tall grasses and an assorted variety of oreganos. In our backyard we have a berry patch that centers around an abundant growth of wild black raspberry vines. We added cultivated raspberry, blueberry and elderberry bushes alongside these breathtaking trio of hibiscus trees gifted to us from Tony’s mom as a housewarming gift. Along the stone path we built a small yoni garden with perennial flowers to support the pollinators. In the yoni garden we grow yarrow, coreopsis from my best friend’s garden, peonies from Tony’s mom for our wedding, and a dwarf peach tree we planted in honor of my niece Kaylynn who passed away in 2013. On occasion we add a few annual flowers like sunflowers and zinnias while nurturing the wild clover, thyme and milkweed that also grow in this bed each year. We also built a gated 12-bed garden; 4 of the beds are in a simple hoop house we also built. Inside the hoop house we typically grow plants that thrive in the extra heat like tomatoes, tomatillos and assorted peppers. In the remaining 8 beds we grow a variety of vegetables, herbs and flowers. (Below is an outline of our 12 raised beds. The beds with the lines and dots at each corner are in our hoop house.) 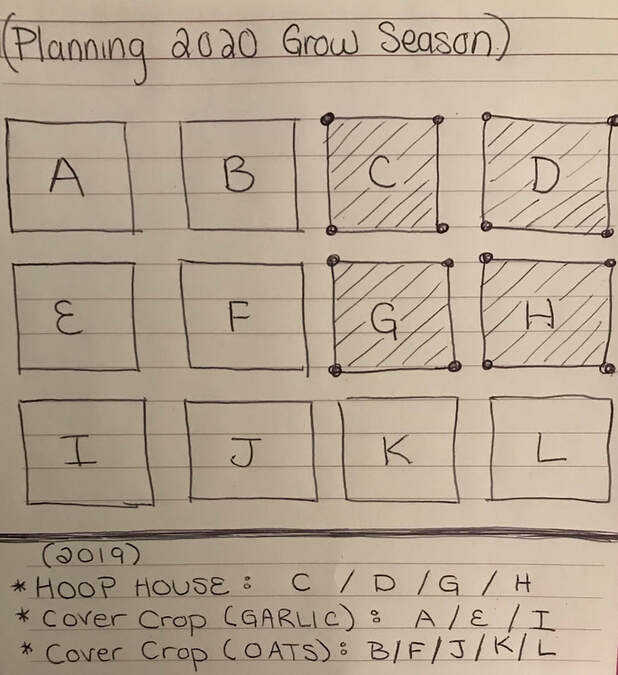 Every year we keep complete records of what we planted in each garden during the grow season as well as what cover crop we planted at the end of the season. All of these records are kept in a binder with a copy of the seed catalogues from each grow season. This binder, along with the seed catalogue for this coming grow season is where we begin the planning process for next year. Gardening Practices There are many practices and philosophies that inform how we homestead, grow food and steward the land. And although we will not go into all of them in this blog post we do want to share that we are guided by both science and the sacred. Below we will review a few key practices that inform how we plan our grow season each year. On our homestead we practice a method of gardening called square foot gardening. We chose this method for many reasons, primarily because it allowed us to easily plant above ground. Planting above ground was important because prior to owning our home, the backyard was full of tall arborvitae that left the earth practically impenetrable with gnarly roots systems and compact clay soil. They were cut down long before we bought our home but we did not have the tools and resources to turn the soil enough to grow directly into the earth itself. Tony took a workshop on square foot gardening and then shared the methodology with me; we both decided it was a great fit for us. Each garden bed is divided into 16 boxes and each box has a prescribed template for growing foods of all kinds.
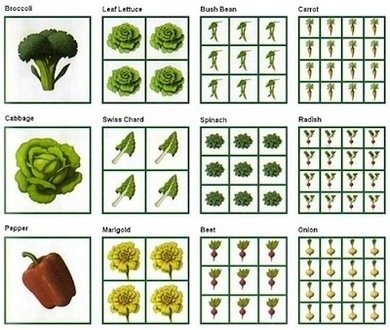
In the images above the first picture (left) shows a single garden bed divided into 16 boxes. The second image (right) shows templates of how to grow varying types of vegetables in each of the (16) boxes; a single broccoli in one box, 4 lettuces in one box or 16 onions in one box. Square foot gardening also uses a particular formula of (soil – compost – vermiculite – fertilizer) in each bed. This combination makes up the soil ecology of each bed that we will grow food in. When we bought our home we began with building 8 raised beds. Over the years the number grew to 12. When we got our first flock of chickens, we added a fence. We then doubled the depth of the beds and added a hoop house over 4 of them. Its been, and continues to be, a gradual process of shaping our little urban homestead and stewarding it into a thriving ecosystem. We also practice companion planting, crop-rotation as well as grow cover crops at the end of each season to assure that the soil health is at its best each year. Companion planting is the practice of combining plants that work well together in one bed and aids in optimal growth and “pest” control. Crop rotation is the practice of planting a different type/category of crops in a specific sequence after each grow season. For example, If you grew legumes in bed A this year, next year you should grow root veggies in bed A (see image below). Alternating growing crops in this way aids in the health and vitality of the soil. Lastly, cover crops are the practice of planting specific plants after the grow season is complete that will be the first to grow in the coming season. Cover crops nourish the soil by providing the nutrients that tend to be deprived from the soil after a season of growing. Some of my favorite cover crops to grow at the end of each season are garlic, oats, vetch, rye and clover. 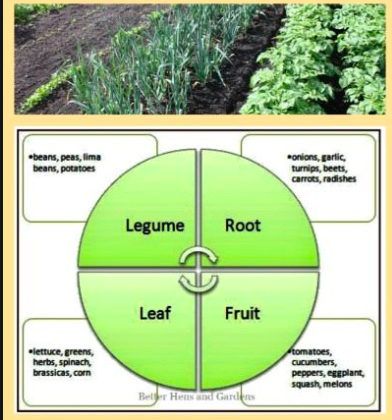 Planning We begin where we left off, reviewing what we grew in each bed during the grow season and what we planted for cover crop. Using that information some of the things we begin to think about that inform our plans are:
Being guided by these questions and others we begin to make lists of all the vegetables, herbs and flowers that come to mind. Then we take that big list and divide it into the following categories of:
Once this information is ascertained we then begin to map out a calendar or timeline for starting our seedlings. Any seeds we do not have in our existing seed storage we purchase via local sustainable organic and heirloom seed cultivators. Once all seeds are in our possession we organize the plants into order based on each seeds outlined days to maturity.Take note that some plants will have the ability to be grown multiple times within a grow season and some will grow one time during the grow season. For some plants, one seed will yield one fruit or one vegetable. For other plants one seed will yield either multiple fruits/vegetables or a plant that will be able to be cultivated and grow back fruit/vegetables. Days to maturity can be found on every seed packet along with other general information about the plant; its important to review these write-ups in entirety while planning, prior to growing. In order to create a timeline for growing seeds you will need to know the zone you are growing in and the last frost date in your zone for the coming grow season. This information will enable you to know when you can begin to actually plant your seedlings into the Earth without risk of lingering winter weather causing harm. Seedlings and the time after transplanting seedlings is vulnerable and in need of caution, diligent tending and observation. Ultimately, when the Earth thaws and the land awakens from its deep Winter rest we will follow its lead and adjust our plans as needed. We will also test the soil in each bed at the start of the grow season to learn the breakdown of the soil’s nutrients. This will aid us in knowing what nutrients are also needed in the bed’s soil. Lastly, we will need to refill the beds to the top with the square foot gardening combo of compost, soil, vermiculite and fertilizer. Knowing the correct amount can be determined with the support of some home math and online calculators. We’ve also found that many garden stores have helpful staff that can aid in figuring out container/bed quantities for soil. Because of the quantity of gardens we have we order bulk soil, compost and mulch orders from our local gardening store. This typically saves us in costs and time as bulk purchases such as these are delivered to our homestead for us. Each year we grow we are presented with varying conditions that we document in the same binder mentioned earlier in this blog post. Some challenges we face in our gardens fall into the common categories of pests, diseases and unusual weather. Other challenges we face are life related; like the loss of job(s) or having unexpected major home renovations that are a priority over our gardens in our financial budget. We have also experienced the loss of family members, work related travel and physical injury that impact our capacity to grow. Life happens and because of that we have to allow our plans/vision for the gardens to breath and be able to ebb and flow with life's fluctuations. Some of our favorite mottos to live by are:
Its my hope that this blog post supports your gardening journey. Never hesitate to reach out with comments below or questions. Feel free to also email me at hello@candacejennifer.me Definitions
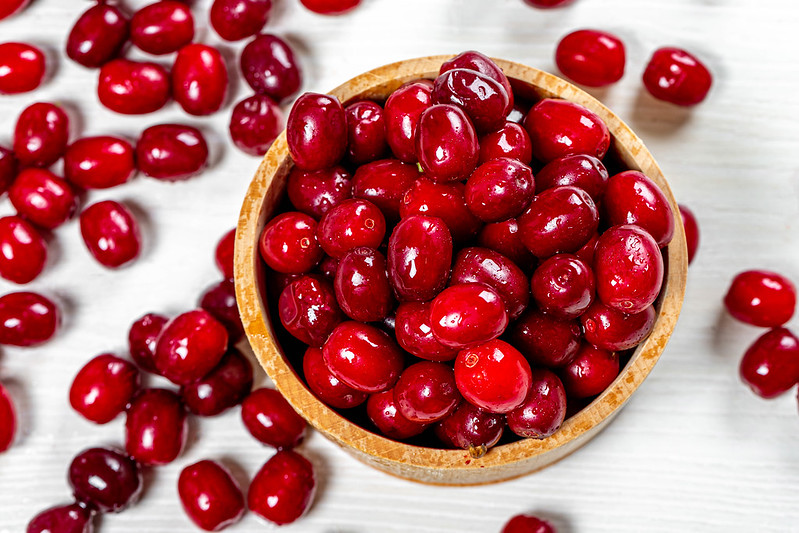 As an ancestral cook I have a deep reverence for the place fermented foods holds across many of our lineages. The fermented foods that are apart of my Afro-Caribbean ancestry have ingredients that are often hard to find in the places I live in now. This doesn't prevent me from having a relationship with the fermentation practices I was taught as a child; it inspires me. I use the practices and the ingredients I can access locally that are of my lineage and those that are local that are not. When I am able to sustainably source the rarer ingredients from my lineage, I make small batches of ferments that I cherish and store small amounts of the raw ingredients in my home apothecary. Blending those ancestral practices with the present day places and spaces I live in now is something I truly enjoy because in someway I feel like its a representation of me and many like me who are "in between". Being a child of displaced peoples due to colonization; born in a land that is supposed to be "my country, my land" but from young, I knew clearly in my bones, was not. Severing my/our connection from our ancestral lands and the sources and resources that nourished the bodies of those that came before me for generations was felt within me without the words to express it. My people are peoples of the tropics; the foods and smells and spices and places that connect me to that story, that truth, that self knowing are not of this land. Some of the foods from my ancestral lands can be obtained in the markets I have access to in Vermont, but many are not. Access to variety increases when one goes to big cities like NYC or uses the internet but, this also serves as a reminder that a part of my being craves for nourishment and connection to a home that is far, far away from my home now. Through the alchemy of food I find ways to make sense of my own narrative of being in between a new home and old home and transform it into a narrative of being a bridge, a portal of healing for both myself and my ancestral narratives. Its November here in Vermont and there are some awesome foods that are in season right now like an astounding variety of gourds, squashes and pumpkins. We still have some beautiful dark leafy greens like an assorted variety of kale and overwintered greens like spinach. We also still have some glorious root veggies being harvested as well. But Ive been waiting for one of my favorite seasonal foods to make their ways into the markets: cranberries! I LOVE whole cranberries! And, as Ive shared, I LOVE fermented foods! And one of my favorite things to make is fermented cranberries. It's super simple in its basic recipe which allows me to preserve and store cranberries to make in various ways; cranberry chutney, cranberry sauce, cranberry jam, cranberry salsa and more! Basic Fermented Cranberries Recipe Ingredients: fresh whole cranberries water celtic grey salt OR sea salt ferment starter Equipment: ball jar with clean rubber sealed lid ferment weight (make sure its the right size for your jar) Directions:
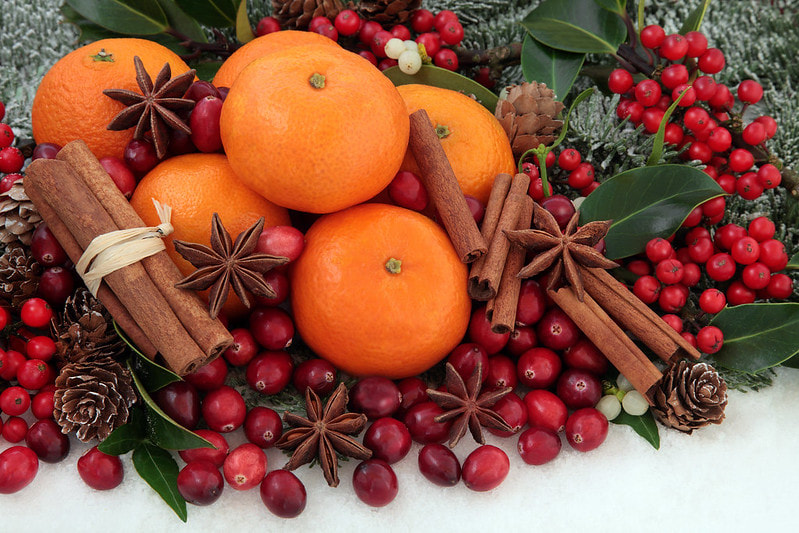 Spiced Fermented Sorrell Cranberries Recipe Much of this recipe will mimic the recipe above but with lots of fun additional ingredients inspired by my Afro-Caribbean ancestry. Here goes! Ingredients: fresh whole cranberries sorrel infused water celtic grey salt OR sea salt cinnamon stick clove thyme ginger star anise lime skin ferment starter Equipment: ball jar with clean rubber sealed lid ferment weight (make sure its the right size for your jar) Salt measurements based on size jar:
Directions:
From this point follow the same steps outlined in Fermentation Process above. Once completed you could enjoy as is or use this blend to make a chutney with more Afro-Caribbean ingredients like: tamarind, mango, peaches, molasses, prunes and more. Remember to listen to and offer gratitude to the foods and nourishing bacteria in your ferments, have fun exploring and enjoy the journey! With love, Candace @conscioushomestead @consciouskitchenvt  |


 RSS Feed